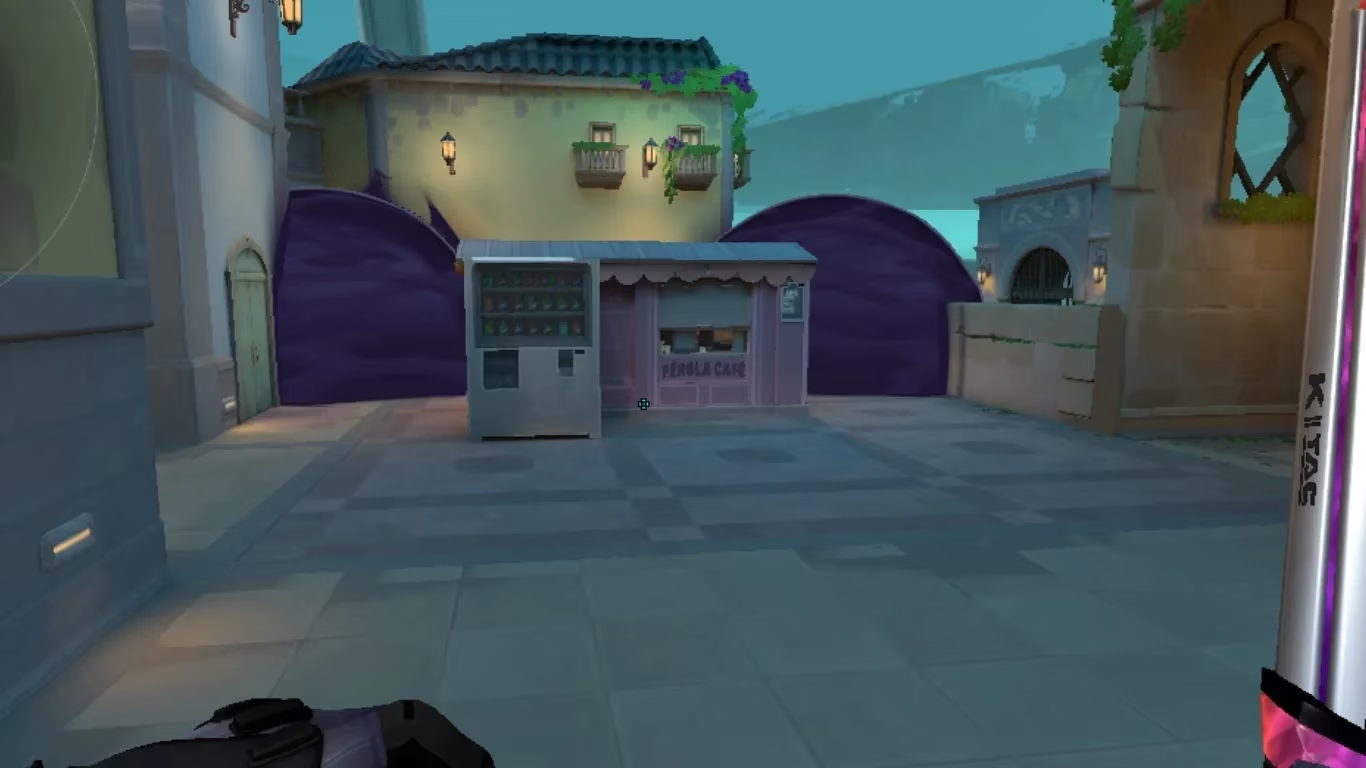
I still remember the first time I dropped into Pearl. As the loading screen faded, I found myself not in a futuristic city or a desert outpost, but in a stunning, submerged world inspired by Lisbon. This wasn't just another Valorant map; it felt like Riot had built an entire underwater city called Pearl on the Omega Earth and dared us to master its deceptively simple, yet brutally strategic, corridors.
You know how other maps have their gimmicks—Bind's teleporters, Split's ropes, Fracture's ziplines? Pearl threw all that out. Its design is minimalist. No mechanical shortcuts, just raw, unforgiving angles and long sightlines. And that's the trap! This apparent simplicity is what makes it arguably the most strategy-intensive map in the game. The sites aren't easy to breach, but once you're on them, good luck retaking. Every round feels like a high-stakes chess match where a single missed callout can cost you the game.
Speaking of callouts, learning them was my first priority. On Pearl, communication isn't just helpful; it's survival. Your team needs to know exactly where "Flowers," "Secret," or "A Link" is in a split second. Let me walk you through the battlefield as I learned it.
A Site: The Deceptively Open Garden
At first glance, A Site seems like the easier target. It's more open, with multiple plant spots. But have you ever felt watched from a dozen angles at once? That's A Site. As an attacker, you think you've cleared Dugout, only to get picked off from Flowers. You push through Main, and someone peeks from the window between Flowers and Secret. It's a nightmare of crossfires! As a defender, it feels equally chaotic—you have to watch A Main, A Link, and that sneaky Mid connector all at once. The site feels both spacious and claustrophobic, a paradox that defines Pearl.
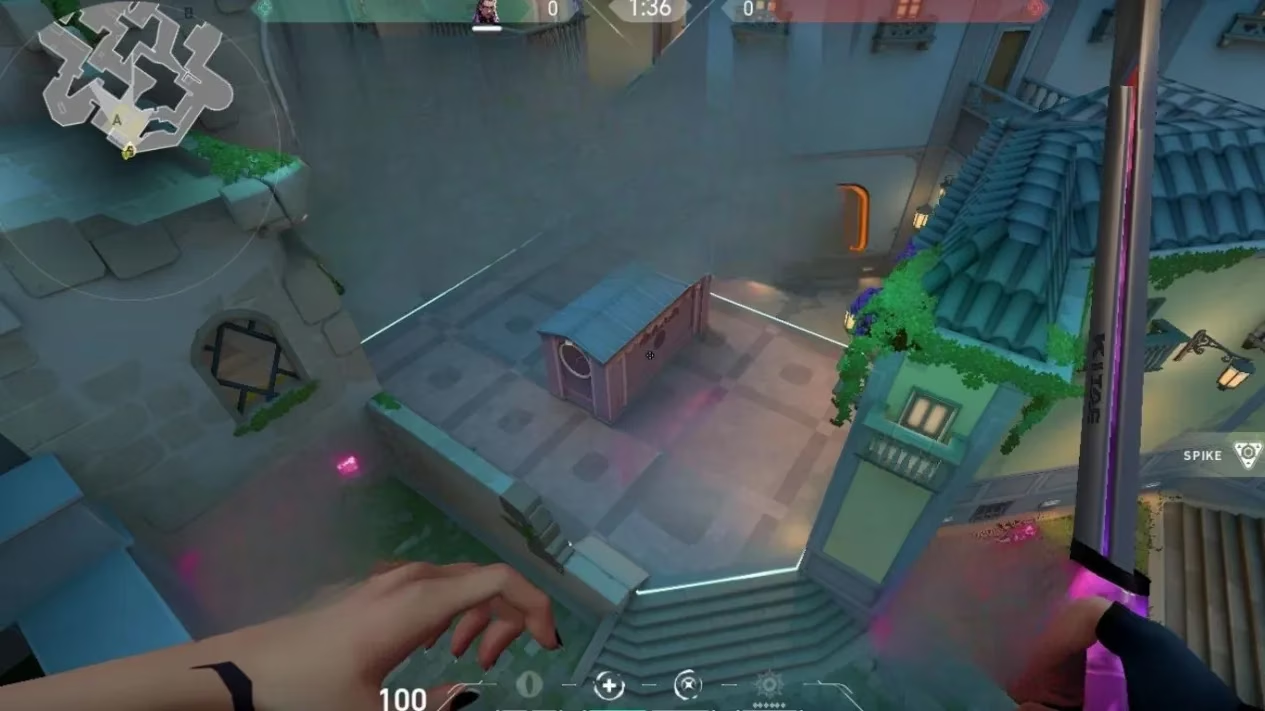
B Site: The Attacker's Nightmare
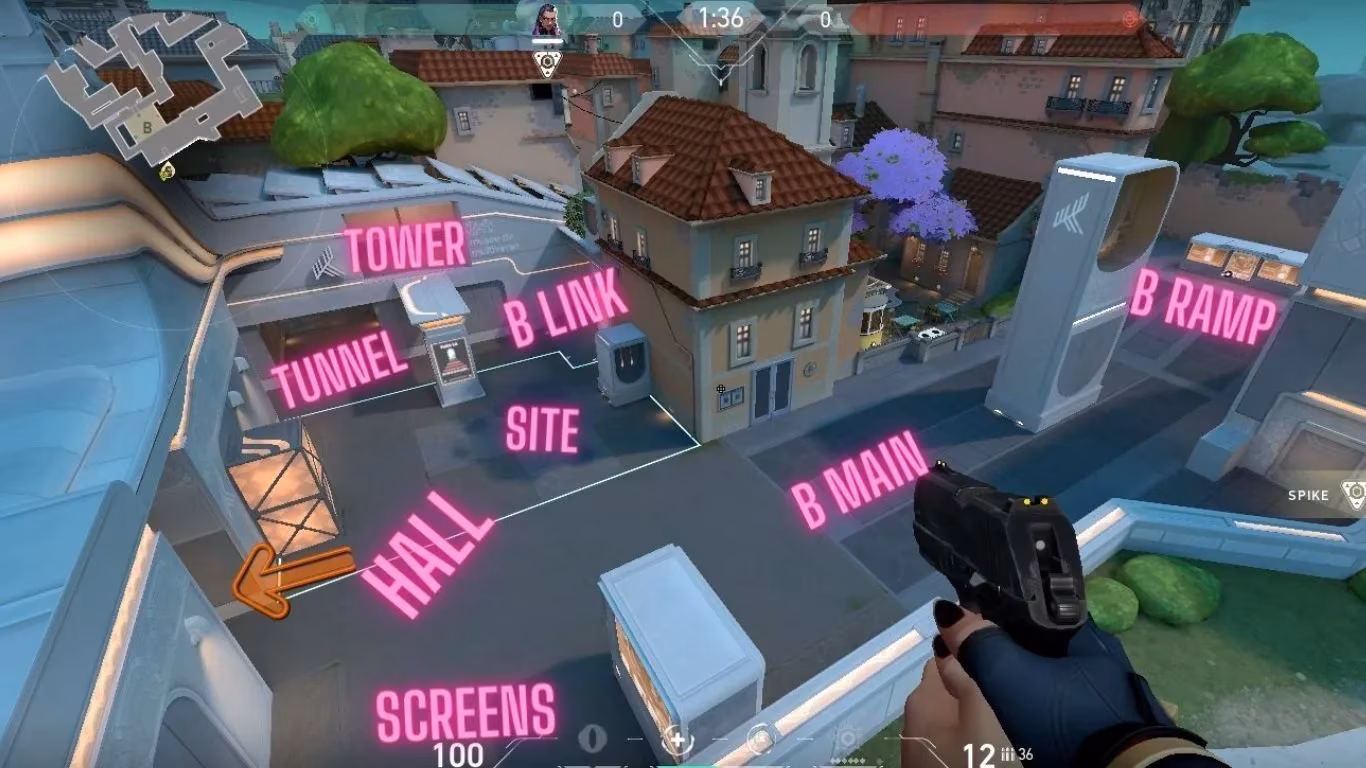
If A Site is a tricky puzzle, B Site is a fortress. I've lost count of how many times I've rounded the corner into B Main or Ramp only to stare down the scope of an Operator. And even if you dodge that, who's hiding in the corner between Main and Ramp? Is someone waiting in Halls? The entire approach is a gauntlet. It forces you to use every piece of utility you have or be an absolute duelist god. But here's the twist: if you do plant the spike here, the tables turn completely. Retaking B as a defender is a special kind of hell, especially with post-plant lineups from agents like Viper or Brimstone raining down.
The Heart of the Map: Mid Control
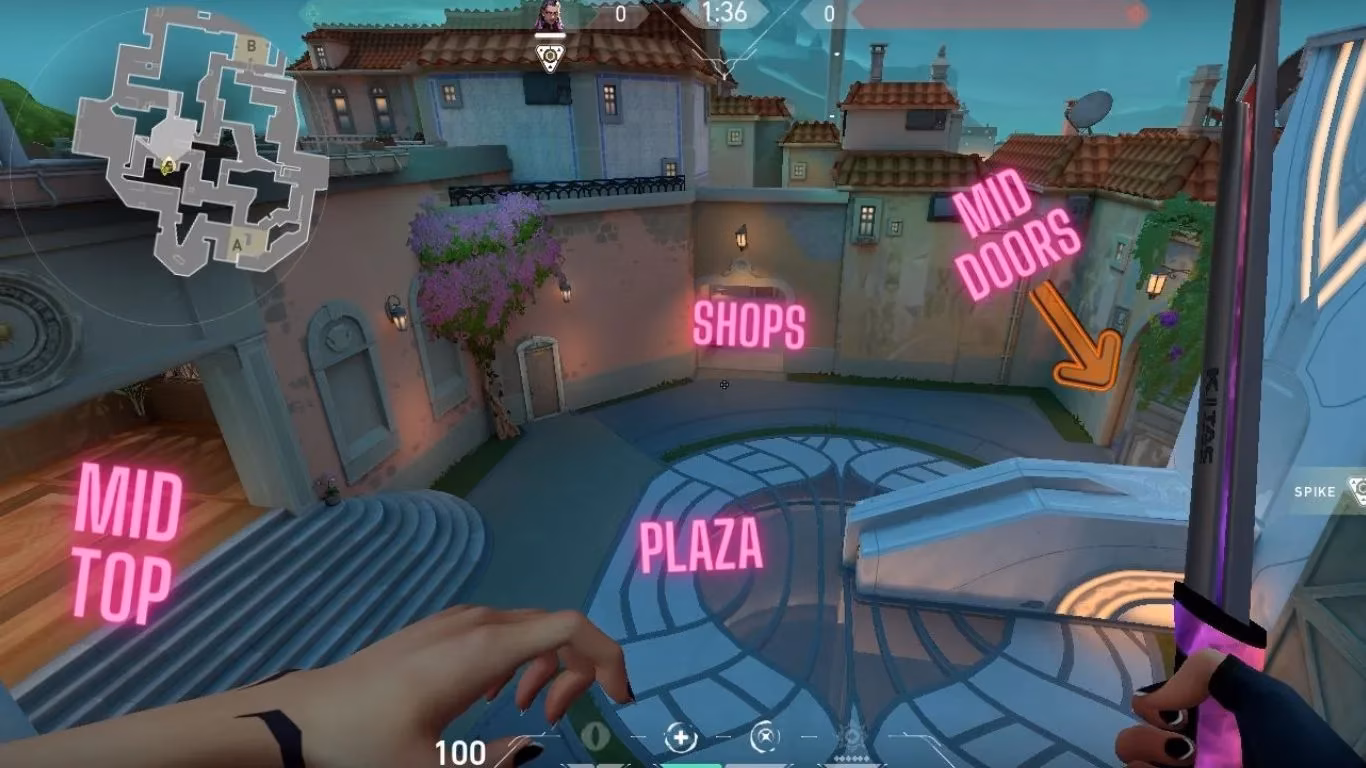
This is where Pearl's true nature is revealed. Compared to maps like Split where Mid is a journey, getting to Mid on Pearl is as simple as going through Waters from Defender Spawn. But that ease of access is a double-edged sword. Mid is the map's circulatory system. Lose control of it, and you've lost the map. A lurker in Mid can rotate to either site in seconds, flank through Art, or pressure Doors. The layout seems simple, but with corners in Art, Doors, and Shops, it's a playground for ambushes. As a defender, if you let a skilled lurker like Omen or Yoru into Mid, good luck finding them. One defender must always anchor this area—it's non-negotiable.
My Attack Strategies: A Site Takeover
When my team hits A, we follow a strict protocol. The first rule? Smoke off Flowers and Secret. This one move cuts off most defender sightlines, forcing them to gamble with a blind peek or fall back. Once the smokes are down, we enter. But you can't just run in! You clear the right-side corner (near Dugout) and check A Link on the left. A well-timed flash into that right corner is a lifesaver. Agent synergy is key here:
-
Sage's Wall is perfect for blocking Secret or A Link entirely, simplifying the site.
-
Killjoy's Turret watching Defender Spawn or A Main tells us if a flank is coming.
-
Breach's Fault Line through the main choke can stun anyone holding a tight angle.
The goal is to turn the defender's multi-angle advantage into a confined space where we control the engagement.
The B Site Gauntlet
Attacking B requires acceptance: you will spend utility or lose players. There's no cheap way in. Our most successful strategy involves a heavy utility dump. A Brimstone is almost essential. Imagine smoking off Tunnel, Tower, B Link, and one side of Hall simultaneously. It creates temporary safe zones to push through.
The sequence is brutal but necessary:
-
Smokes go down.
-
Clear the deadly corner between B Main and Ramp.
-
Nade behind Screens to flush out campers.
-
Use Sova's Recon Dart or Skye's flash to clear Halls.
-
If we have a Sage, her wall on the site itself (like on Icebox B) can guarantee a safe plant.
Once the spike is down, we don't cluster. We spread to Art, Hall, and Main, making the retake a nightmare for defenders who now have to clear every nook themselves.
Holding the Line: Defender Mindset

Here's a crucial piece of wisdom I learned the hard way: even though B Site favors defenders, Pearl is an attack-sided map overall. Why? Because of Mid. As a defender, your strategy revolves entirely around Mid control. Our standard setup is 2-A, 2-B, with a sentinel (like Cypher or Killjoy) holding Mid, preferably angled toward A Side because of its higher attack probability.
Agent picks define defense on Pearl:
-
Chamber is almost mandatory. His ability to hold B Main with an Operator and teleport to safety is unmatched. A good Chamber player can aggressively hold B Main, get a pick, and vanish before the enemy can trade.
-
Breach on A Site is a powerful combo. His Fault Line and flash are perfect for stalling pushes through the narrow A Main chokepoint once you hear them coming.
-
If intel suggests an A hit, smoking A Main and A Link can stall the push significantly, buying time for rotations.
Playing defender on Pearl isn't about passive holding; it's about strategic aggression and information warfare. You need to contest Mid, use utility to delay pushes, and have flexible rotations ready at all times.
Four years after its release, Pearl remains a testament to strategic depth in Valorant. It doesn't rely on flashy mechanics; it relies on your game sense, communication, and teamwork. Every corner, every long hallway, every callout matters. It's a map that punishes autopilot and rewards thoughtful play. For me, mastering Pearl wasn't just about learning callouts; it was about learning to think three steps ahead. In the ever-evolving meta of 2025, with new agents and strategies, the core lessons of Pearl—map control, angle clearing, and team coordination—are more relevant than ever. It's the purest form of tactical shooter within Valorant, and that's why, despite the frustration, I keep queueing up for one more dive into its beautiful, treacherous depths.